Webflow Dashboard
After you log in to Webflow, the first screen you’ll see is your Dashboard. This is where all of your websites (projects) are listed, and where you can access each site’s tools.
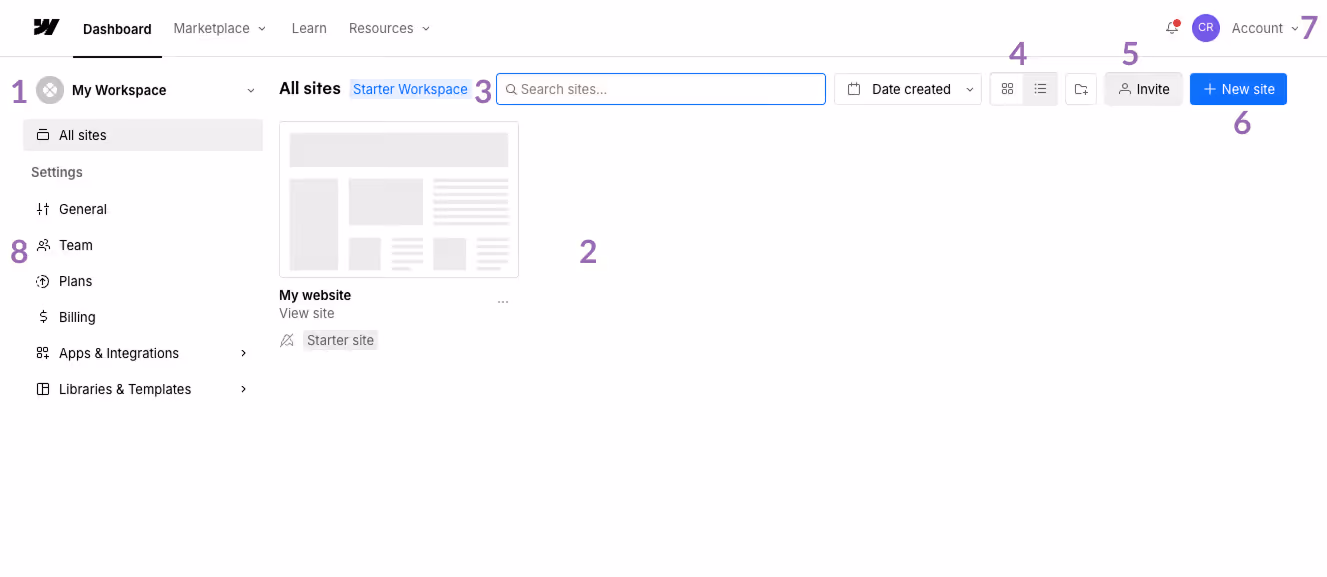
Here’s a quick overview of what you’re looking at:
1. Workspace Selector (top-left): Shows which Workspace you’re currently in. If you don’t see your site, click this dropdown and switch to your own Workspace.
2. All Sites List (center): Displays all the websites (projects) in your Workspace. Click your site’s thumbnail to open it.
3. Search & Sort (top-center): Lets you search for a site by name or change how your projects are sorted.
4. View Options (grid/list icons): Changes how your sites are displayed—grid view or list view.
5. Invite Button: Used for adding collaborators to your Workspace. Most clients will never need this.
6. New Site Button: Creates a brand-new Webflow project. Ignore this unless you intend to build a new site.
7. Account Menu (top-right): Your profile menu. Includes account settings, billing, and logout.
8. Workspace Settings (left-hand sidebar): Controls settings for your Workspace, not your individual website.
Includes:
- General (Workspace name, logo)
- Team (members and permissions)
- Billing (Workspace billing, not site hosting)
- Apps & Integrations (rarely used)
These are not used for day-to-day website management.